
If you like to customize your Samsung Galaxy A50 and have complete control over its firmware, then the first thing you should do is root it. You can root the Samsung Galaxy A50 with model number SM-A505F by using Magisk, the most popular rooting tool for Android phones. The developer has released an updated version of the tool that supports Samsung phones with the One UI Android 9.0 Pie firmware update.
Below you will learn how to root the Galaxy A50 using Magisk, and how to install Magisk Manager. Magisk enables root and allows you to completely customize the system of the phone. Furthermore, you can use modules with the help of Magisk Manager. There are different modules that serve different purposes that you can freely download and enable.
Contents
Warning
Before you go ahead with the tutorial below, please read all of the warnings below. Do not proceed if you do not want KNOX to be triggered or if you do not want your data to be erased.
- This process will wipe your phone. When you unlock the bootloader for the first time to install Magisk, a full data wipe will be performed. Please make a data backup before you continue, otherwise, you will lose all of the data.
- Installing Magisk on your Galaxy A50 will trigger KNOX. This is an indicator that shows whether the firmware has been tampered with or not. Some stores will refuse warranty service if KNOX is tripped.
- This process involves installing Magisk in the recovery partition of the phone. This is not the same as the traditional Magisk rooting process.
Installing Magisk on your phone is done in three steps. The first step is to unlock the bootloader and make it accept unofficial images, the second step is to patch the firmware and flash it through Odin, and the last step is to correctly boot the phone with Magisk installed.
1. Unlock Galaxy A50 bootloader
Samsung has introduced a new service called VaultKeeper. This means that you won’t be able to flash custom binaries or unofficial partitions unless VaultKeeper allows it. Here’s how to do it.
-
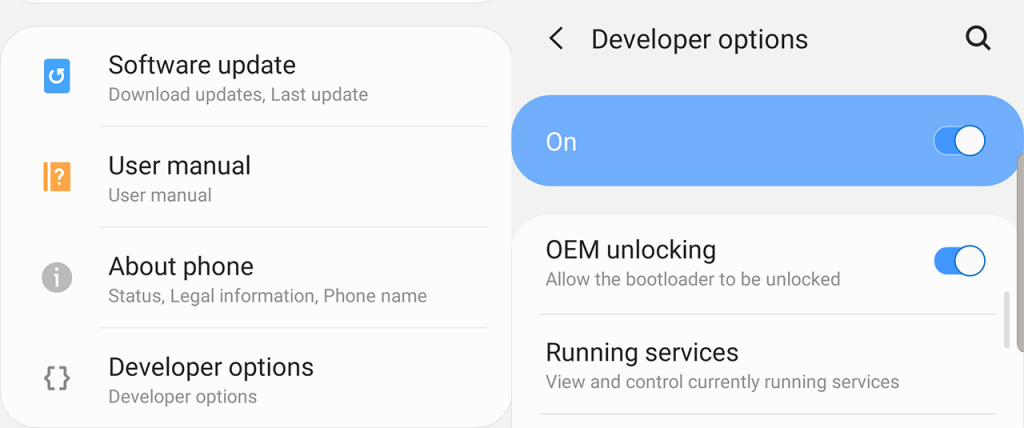
- Enable OEM unlock. To do so, go to Settings > Developer options and tap on OEM unlocking.
- Boot into download mode. To do so, press and hold the power button and tap on Power off to turn off the phone. Now press and hold the Volume Down + Power buttons at the same time.
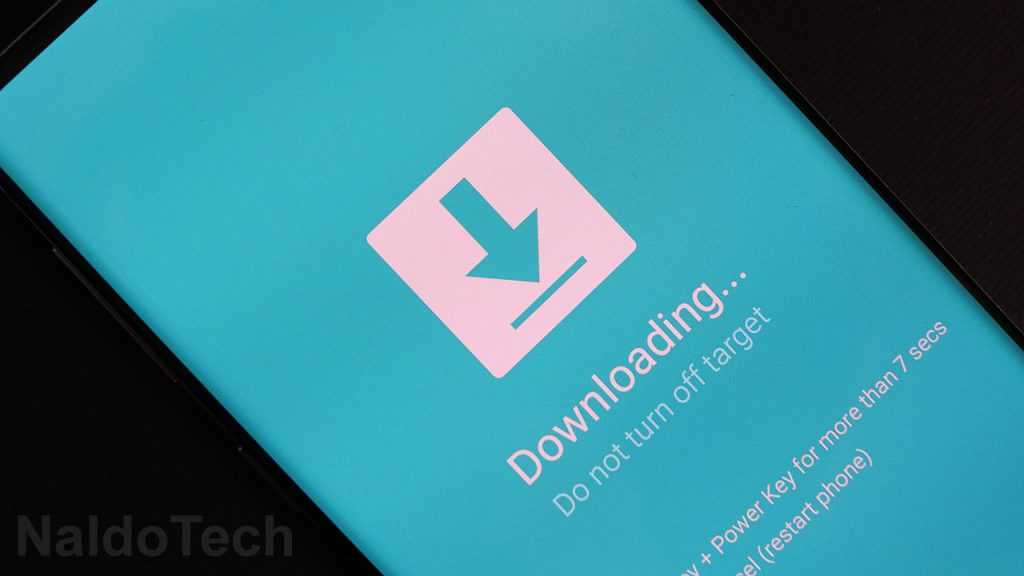
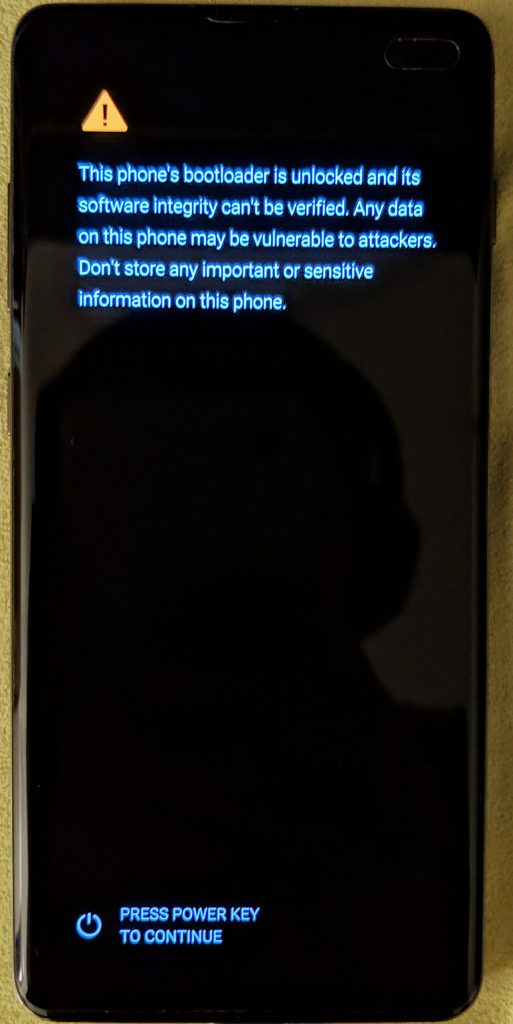
- Once in download mode, long press the volume up button. This will unlock the bootloader and all data on your phone will be deleted.
- The phone will automatically reboot. Connect your phone to a WiFi network and skip through the rest of the setup.
- Go to Settings > About Phone > Software Information and quickly tap 7 times on Build Number to enable Developer Options. Go to Developer options and make sure that OEM unlocking is greyed out.
- Enable OEM unlock. To do so, go to Settings > Developer options and tap on OEM unlocking.
2. Patching Galaxy A50 firmware & installing Magisk
Now that the bootloader is successfully unlocked, you have to flash Magisk to your phone. This time around, Magisk lives in the recovery section, so every time you reboot your phone, you have to go through recovery if you want to have Magisk.
- Download the latest stock firmware for your Samsung Galaxy A50 and extract the file.
- Copy and the AP .tar file and transfer it to the internal storage of your phone. The file name starts with AP and ends with .tar.md5 (AP_[device_model_sw_ver].tar.md5).
- Download and install the latest Magisk Manager APK.
- Open Magisk Manager and go to Install > Install > Select and Patch a file.
- Navigate through the storage and select the extracted AP file. The firmware will be patched and the new version will be found under Internal Storage/Download/magisk_patched.tar.
- Transfer the patched file to your computer.
- Turn off your phone and boot your phone into download mode.
- On Odin, click on AP and select the patched .tar file. Uncheck “Auto Reboot” and click on Install.
- The tool will flash Magisk on your Galaxy A50.
3. Boot Galaxy A50 with Magisk installed
- Once Odin is finished with installing Magisk, press and hold the Volume Down + Power button to exit download mode. Once the screen is off, quickly press the Volume Up + Power buttons at the same time. A bootloader warning will show up. Keep pressing the volume up button. The phone will enter stock recovery mode.
- Using the volume buttons in recovery, highlight Wipe data/factory reset and press the power button to confirm.
- Now highlight and select Reboot system now and quickly press the Volume Up + Power buttons at the same time. When the bootloader warning shows up again, release the buttons this time around.
- The phone will reboot two times and then it will boot up normally.
The process above will enable root and will also install Magisk Manager. This is the app that you have to use to control root functions and to download and install different modules. With that said, you have successfully rooted your Galaxy A50.
Conclusion
All you need to remember is the bootup procedure, and what you need to press if you want to boot in recovery or boot the system with Magisk installed.
1. Powering up normally → System with no Magisk
2. Power + Volume Up → Bootloader warning → Release all buttons →System with Magisk
3. Power + Volume Up → Bootloader warning → Keep holding volume up → Actual recovery
Now that you have installed Magisk on your Galaxy A50, you can later on update Magisk directly from the Magisk Manager app. If you want to update to another version of the firmware, also patch it through Magisk Manager first, and then flash it. With Magisk you can now enjoy all root benefits plus Magisk’s module system.
Thaks man, its working,?? u r genius..
im looking in XDA but all failed
That worked
But the biometric lock gets in trouble and the cellphone restarts itself !!!؟
Thanks dear
Your volume button trick is 100000% working.
I am success with your trick.
Thank u so much.